
Choosing cameras for shelf recognition
Most shelf-recognition projects that disappoint were lost at the camera. The model was rarely the problem. A detector cannot recover detail the lens never captured. Before anyone trains anything, five physical choices set the ceiling on accuracy: resolution, field of view, mounting, capture frequency and lighting.
This is the checklist we walk through on every retail shelf-monitoring and price-tag install.
Resolution
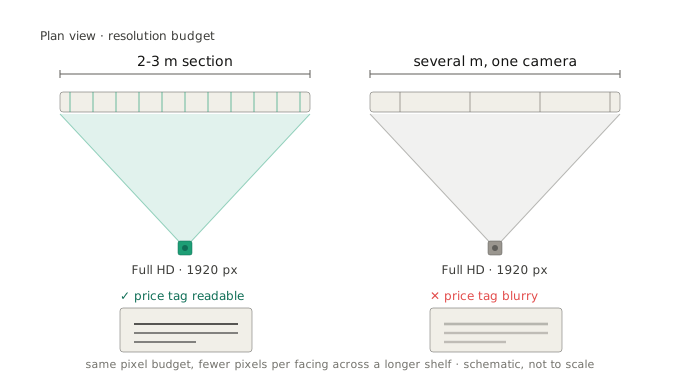
It is tempting to assume any camera will do. In practice, below Full HD (1920×1080) the system starts confusing small details, can’t read price tags, and struggles to separate similar products. The smaller the packaging and the longer the shelf, the more resolution you need. A single camera covering several meters of shelving has to spread its pixels across all of it.
Resolution is the wrong place to save money. Cut it and the whole system loses accuracy, from the long shelf to the small print.
Field of view
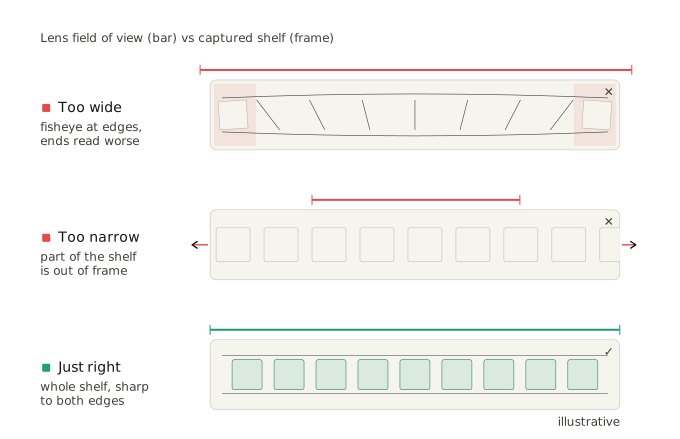
Field of view is a balance, and both extremes fail.
Too wide, and you get a fisheye effect. Objects near the edges stretch and distort, so products at the ends of the shelf read worse than those in the center. Too narrow, and part of the shelf falls outside the frame. The goal is a lens that shows the whole required area clearly, with no distortion at the edges.
Mounting height and placement
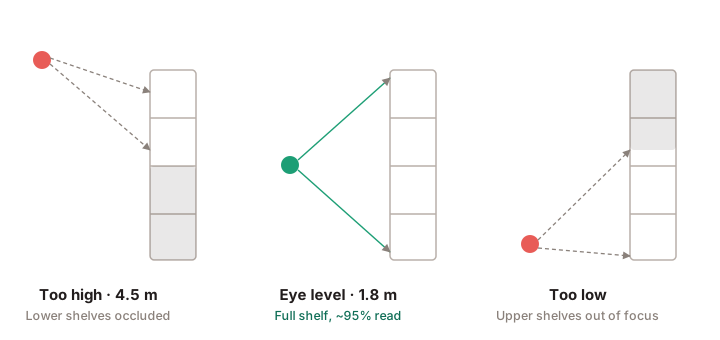
The camera should see the shelf at roughly the angle an average shopper does.
Mount cameras too high and you get a top-down view where products occlude each other. A large part of the assortment becomes invisible to the system. Mount them too low and the upper shelves drift out of focus. Island displays and refrigerators usually need custom mounting, and those setups are worth testing before you commit to a rollout.
Capture frequency
How often you capture depends on what you are trying to catch. If you don’t need minute-by-minute change, one image an hour is often enough. If you need to catch out-of-stocks the moment they happen, or react quickly to layout changes, you move toward near real-time.
The trade-off is cost. The higher the frequency, the heavier the load on storage and processing. Match the cadence to the decision the data feeds. “As often as possible” is the wrong target.
Lighting: often it matters more than the camera
This is the one teams underestimate most. In bad lighting even a top-end camera is ineffective. An expensive camera in poor light can do worse than a cheap one in good light. And lighting varies across a store, so the same product can look completely different depending on where it sits.
Poor lighting hurts recognition in three distinct ways.
It changes how products look. Colors distort, contrast collapses or blows out, small packaging text blurs. In dim light red can read as brown and blue as near-black, and the system starts confusing similar products. We have seen the same can of cola recognized as two different items, once in a fridge, once on an open shelf, purely because of light.
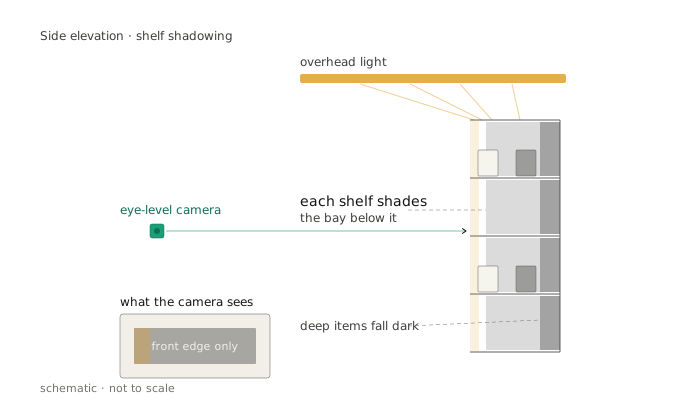
It creates shadows, overexposure and glare. Upper shelves cast shadows on lower ones. Items deep on a shelf fall into the dark, and the system sees only fragments of a package. Direct light blows highlights into white patches with no detail, common near windows on sunny days. Glass surfaces are the worst offenders. A refrigerator door reflects like a mirror, so the camera captures the reflection and loses the product. The glass can be clean and the product perfectly placed, and the system still sees nothing.
It pushes the system into guessing. When the image is too poor to read, a weak system starts to assume: “this shelf usually holds product X, so it’s probably X”. That is unreliable. Products move, displays change, layouts get rebuilt. The whole point of recognition is to measure reality. Guessing defeats it.
Four real installations
The fastest way to learn the rules is to see them broken and respected.
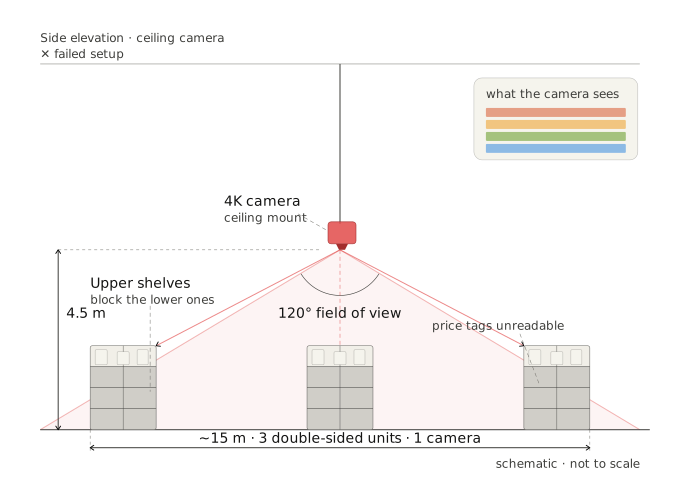
Failed: ceiling camera in a hypermarket
A 4K camera at 4.5 m, 120° field of view, one camera covering three double-sided units, about 15 m of shelving.
The result: upper shelves block the lower ones, and products show up as colored stripes with no detail. Only part of the assortment is recognized, and price tags are unreadable. The cause was trying to save on camera count. Covering too large an area from a single viewpoint destroyed data quality.
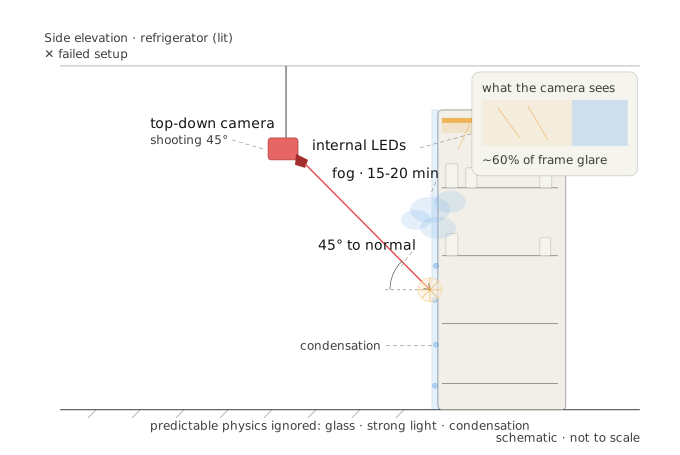
Failed: refrigerators with internal lighting
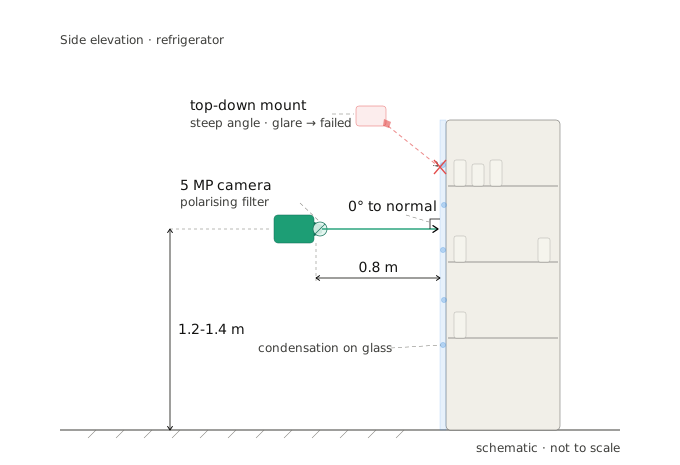
A camera above a refrigerated display, bright internal LEDs, glass doors, shooting top-down at 45°.
Glare from glass and LEDs overexposed the image. Reflections covered roughly 60% of the frame, condensation blurred the rest, and once the doors opened, fogging blinded the system for 15-20 minutes. The cause was the physical environment, the glass, strong light and condensation, all predictable and all ignored at design time.
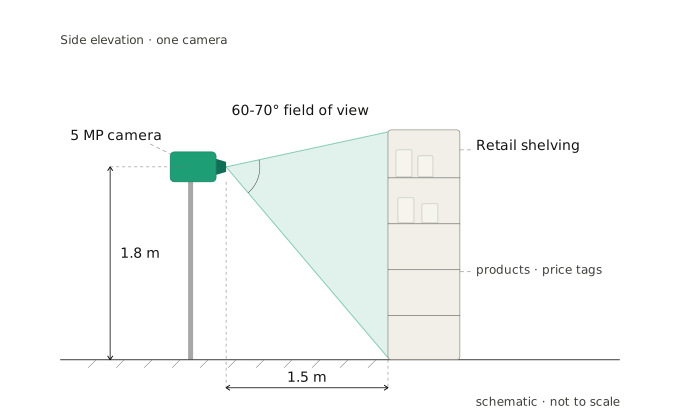
Worked: modular system in a premium supermarket
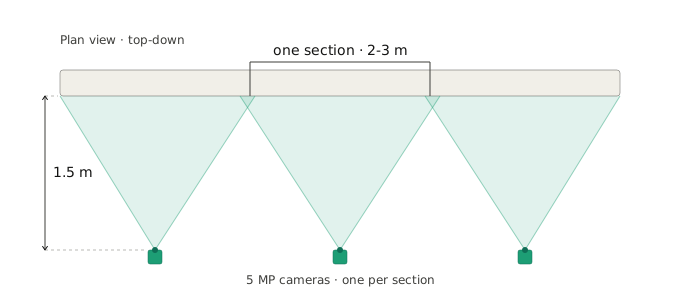
5 MP cameras at 1.8 m, each covering 2-3 m of shelving (one section), 60-70° front-facing field of view, 1.5 m from the shelf.
The system recognized up to 95% of products. Small packaging details were visible, price tags were readable, counting was accurate, and it caught even minor product shifts. The spend on more cameras paid off through data accuracy: a deliberate balance between camera count and coverage quality.
Worked: refrigerators with the right angle
Cameras mounted frontally at mid-shelf height (1.2-1.4 m), 0.8 m from the glass, shooting perpendicular to it (0° to the normal), with a polarizing filter on the lens.
The perpendicular angle and the polarizing filter minimized glare. The short distance offset condensation, and recognition worked in about 90% of cases, recovering within 3-5 minutes of the doors opening. Combining glare reduction, the right angle and close proximity produced stable performance where the top-down setup had failed completely.
The takeaway
Spend the camera budget where it sets the ceiling, resolution and lighting first, then angle and coverage, and test the awkward fixtures (islands, fridges) before rollout. Every point of accuracy you lose at the lens is a point no model will give back. This is what the test phase of a shelf-monitoring project exists to measure, honestly, in your stores, before anyone signs up to scale.